Using the DB SCHENKER | connect dashboard
0.0 Finding your way around the DB SCHENKER | connect dashboard
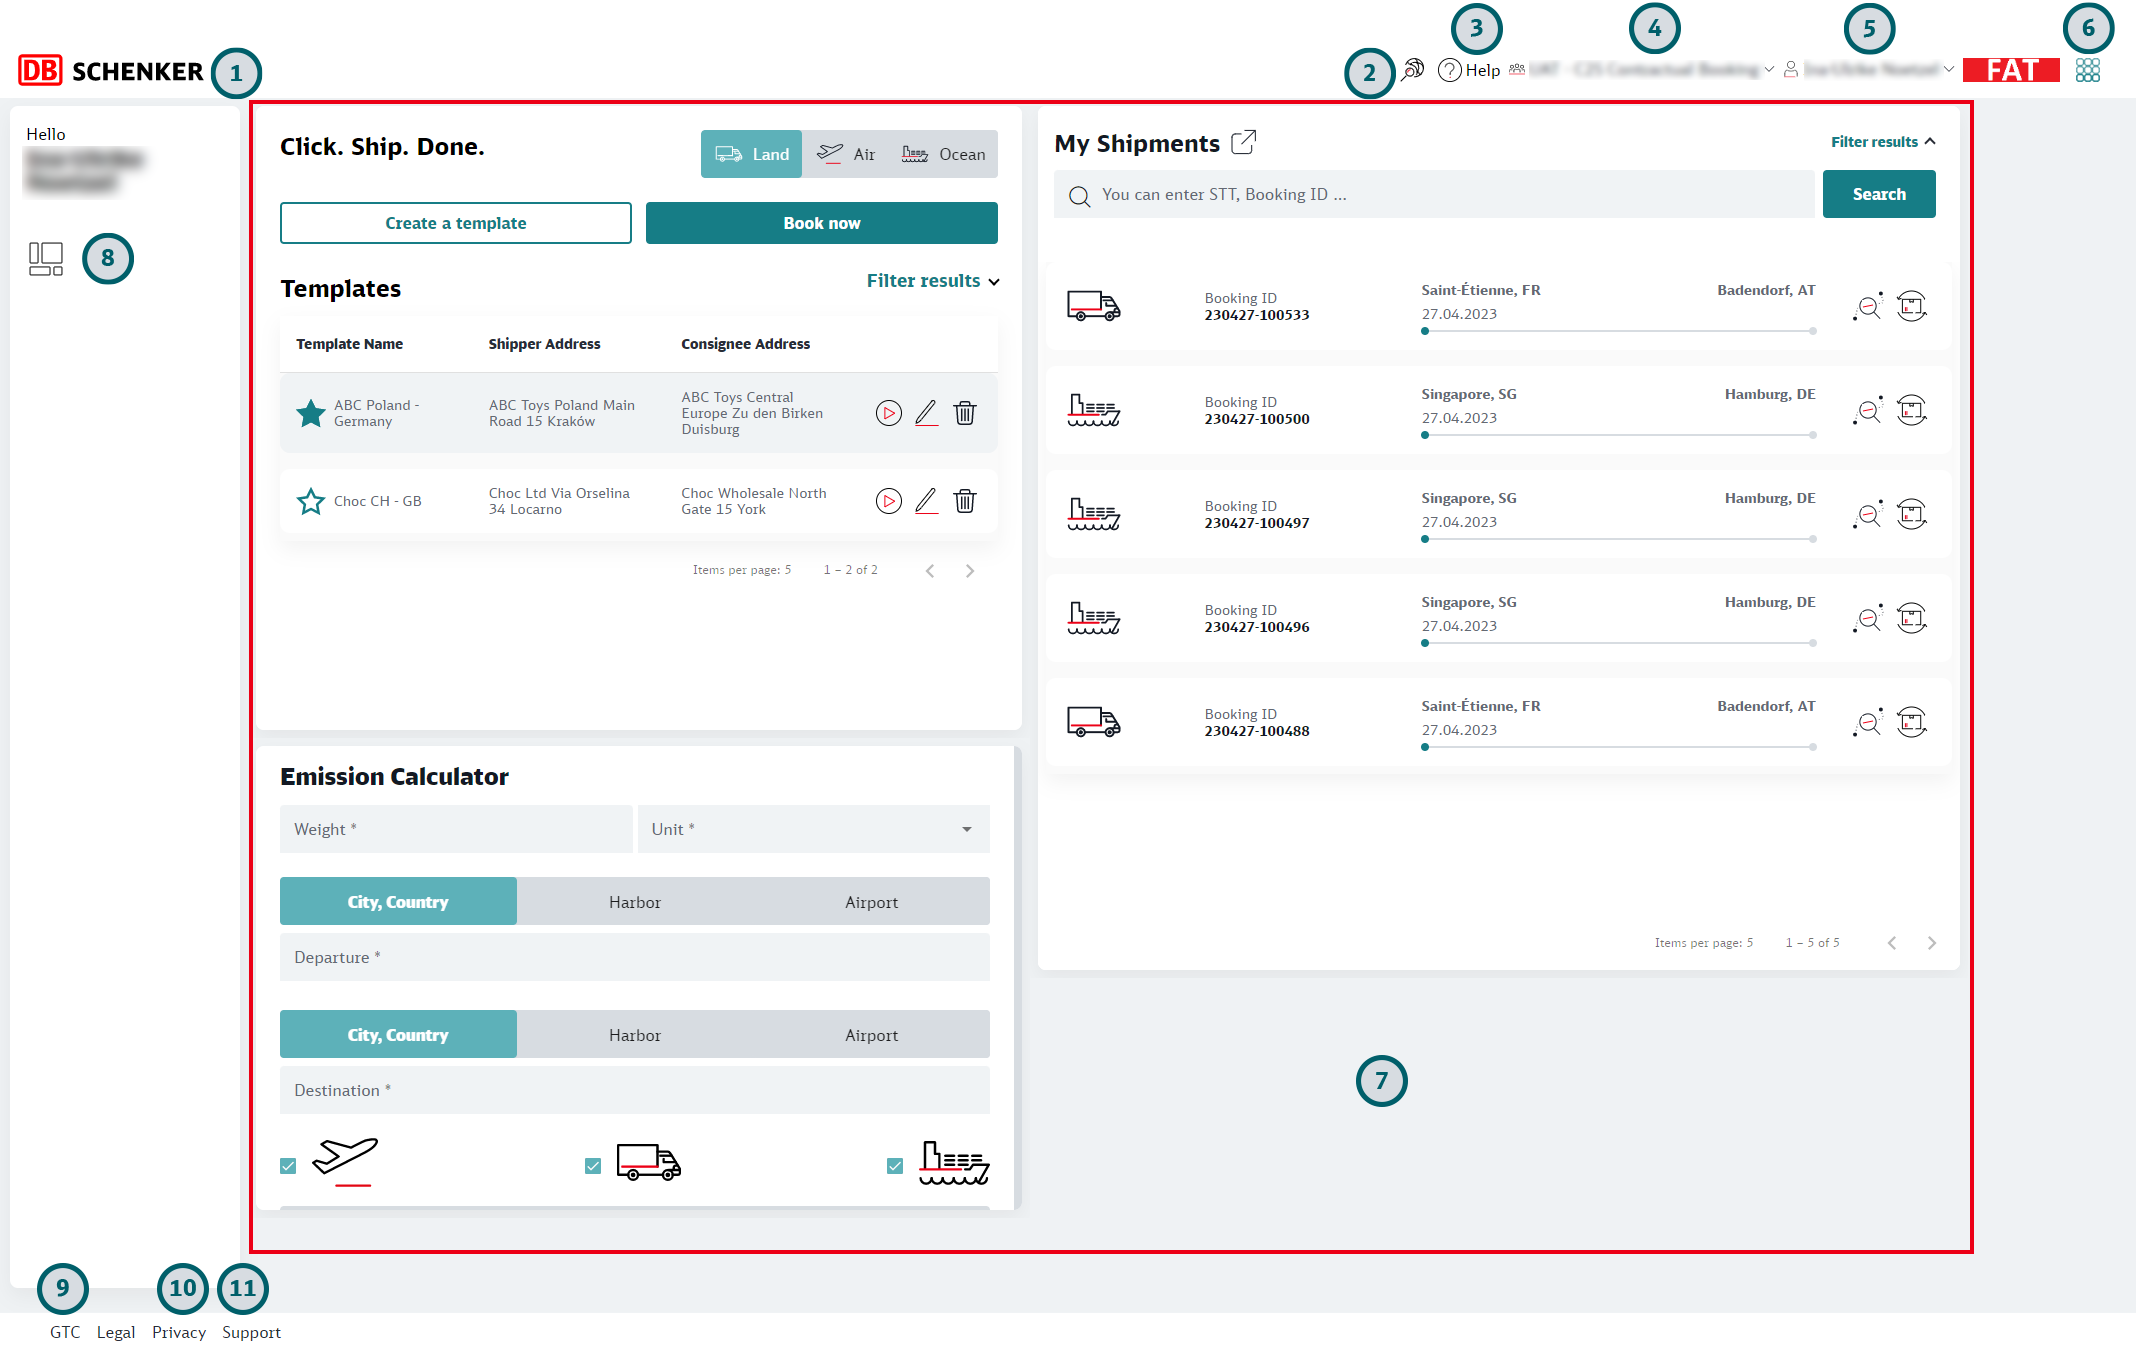
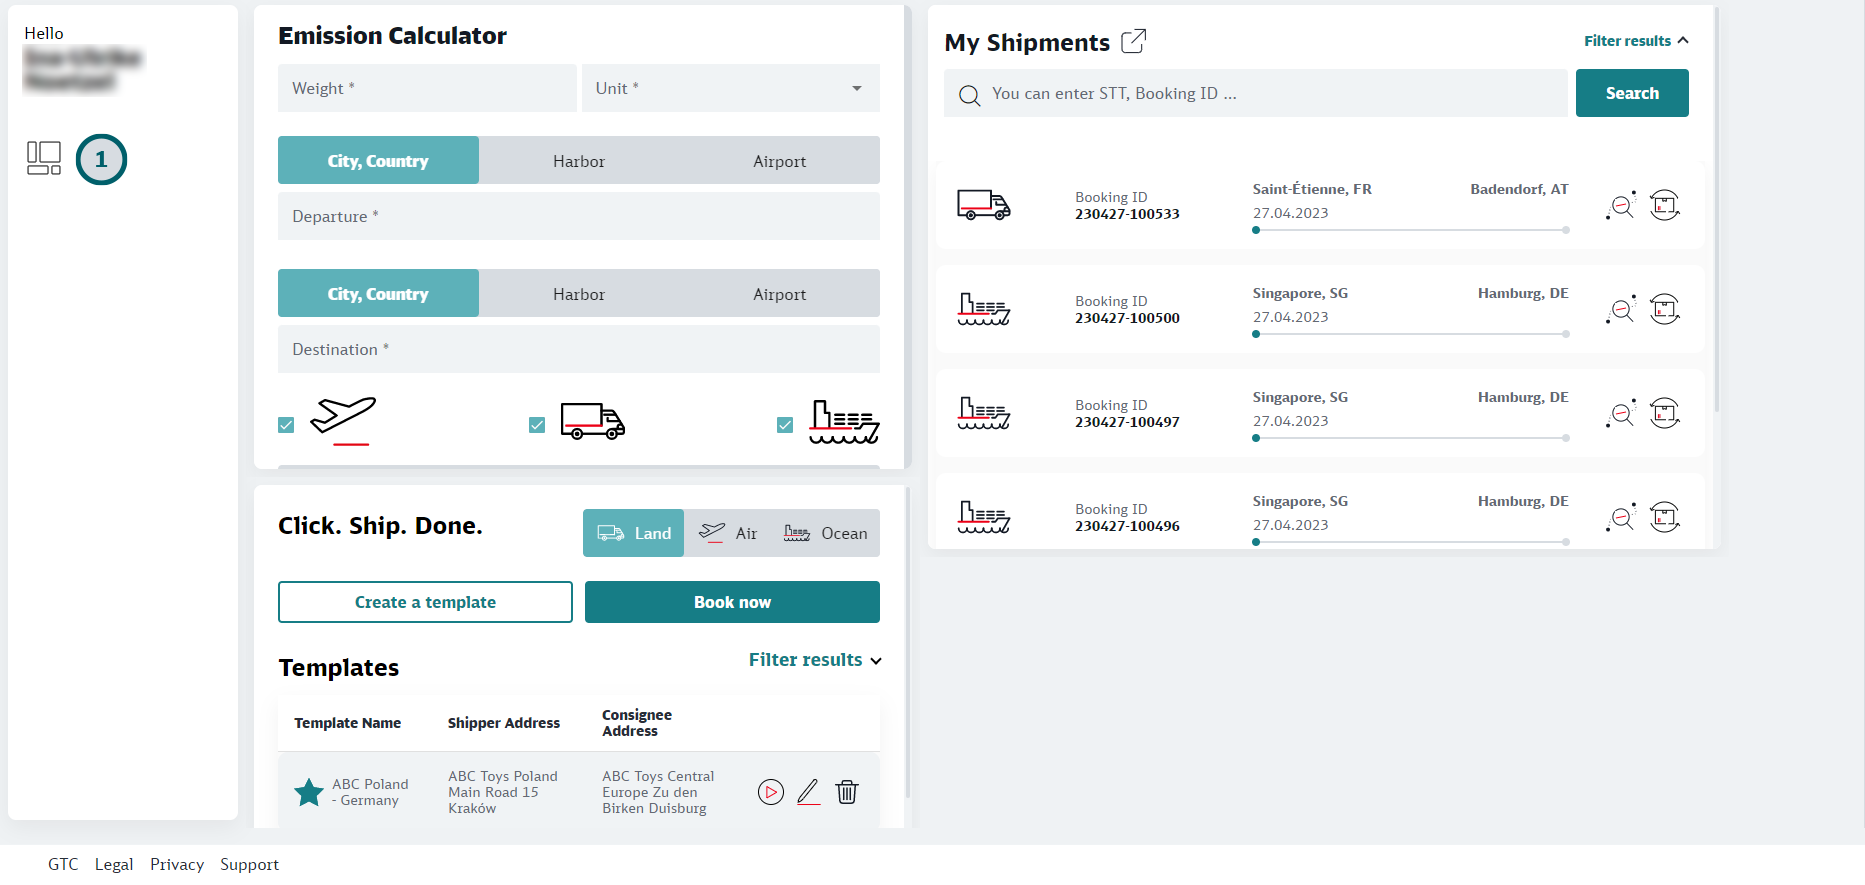
After you have logged in you will see the DB Schenker | connect dashboard. The image below shows all functionality the dashboard has to offer.
-
Use the Schenker logo
Click on the Schenker logo to return to the DB Schenker | connect dashboard at any time. -
Access Quick Tracking
Use this icon to track your shipment without navigating to the Tracking eService first. -
Click Help
Click on "Help" to open the DB Schenker | connect dashboard Online Help. -
Select User group
If you have been configured for several user groups, you can change your user group here. -
Change User settings
Click on your name to:- change your password, or
- change your user settings (i.e. your preferred language, time, date and number formats, your time zone or currency)
- log out from DB Schenker | connect
See Changing your language and user preferences for detailed instructions.
-
Access all configured eServices and select favorites
Click this icon to access your favorite eServices. You can also select additional eServices for your favorites list, or deselect them. See Accessing your eServices and change favorites for details. -
Access selected widgets
In the dashboard you can place the widgets you need for your daily work. -
Edit Widgets
Click here if you want to remove widgets from the dashboard or add more widgets to your dashboard. You can also change the size and location of widgets using this icon. See Adding widgets and Removing widgets at the bottom of this page for details. -
Check GTC
Find out the DB Schenker | connect dashboard Conditions of Use. -
Check our Privacy settings
Check here for DB Schenker | connect dashboard Data Protection Principles. You can also access and change the cookie settings from here. -
Ask for Support
The support form allows you to get in contact with Schenker representatives.
0.0 Adding widgets
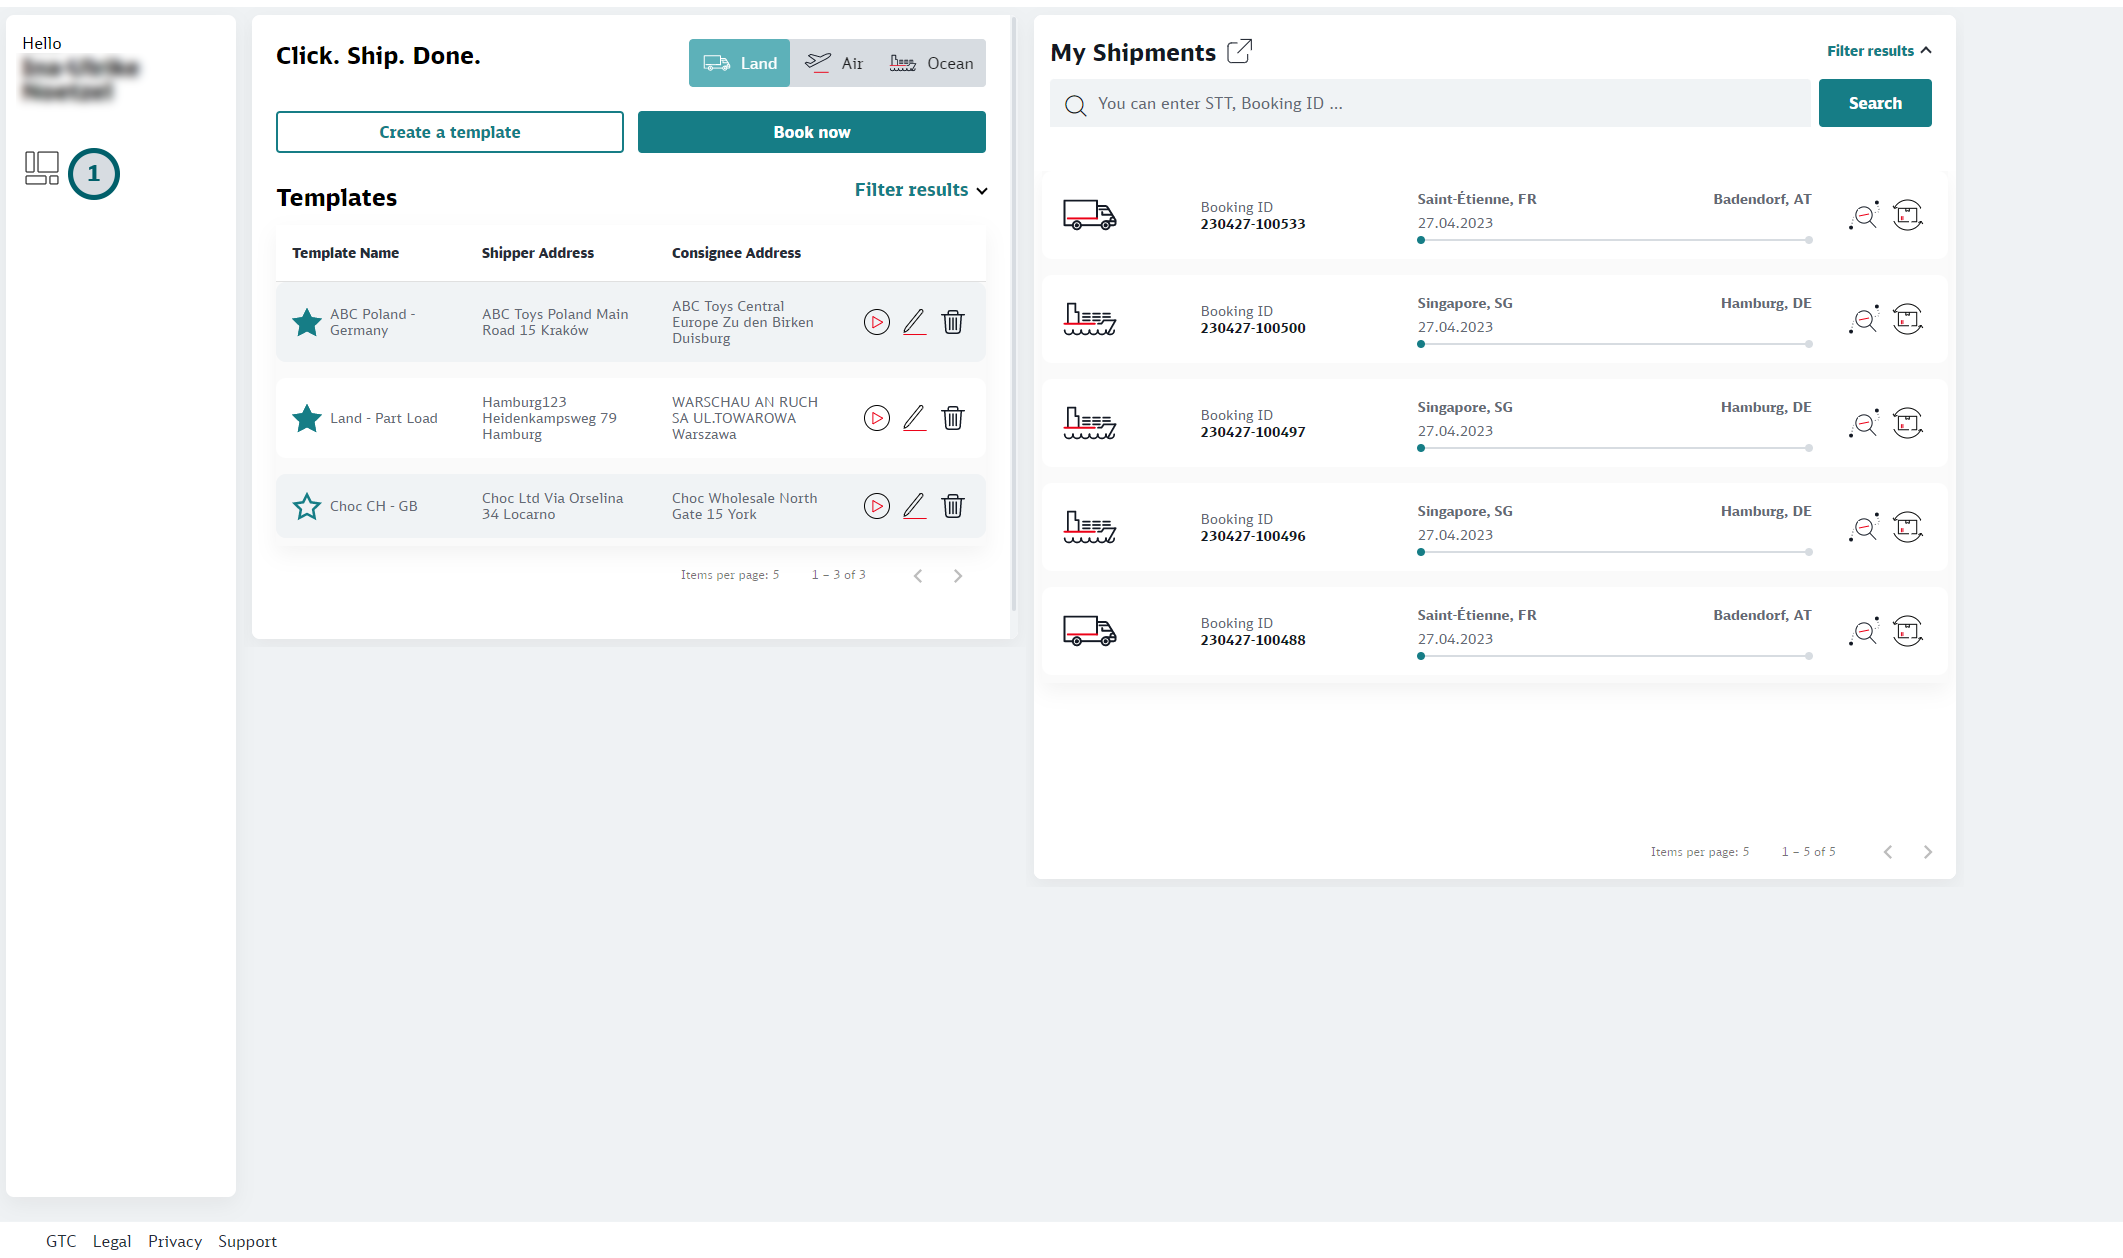
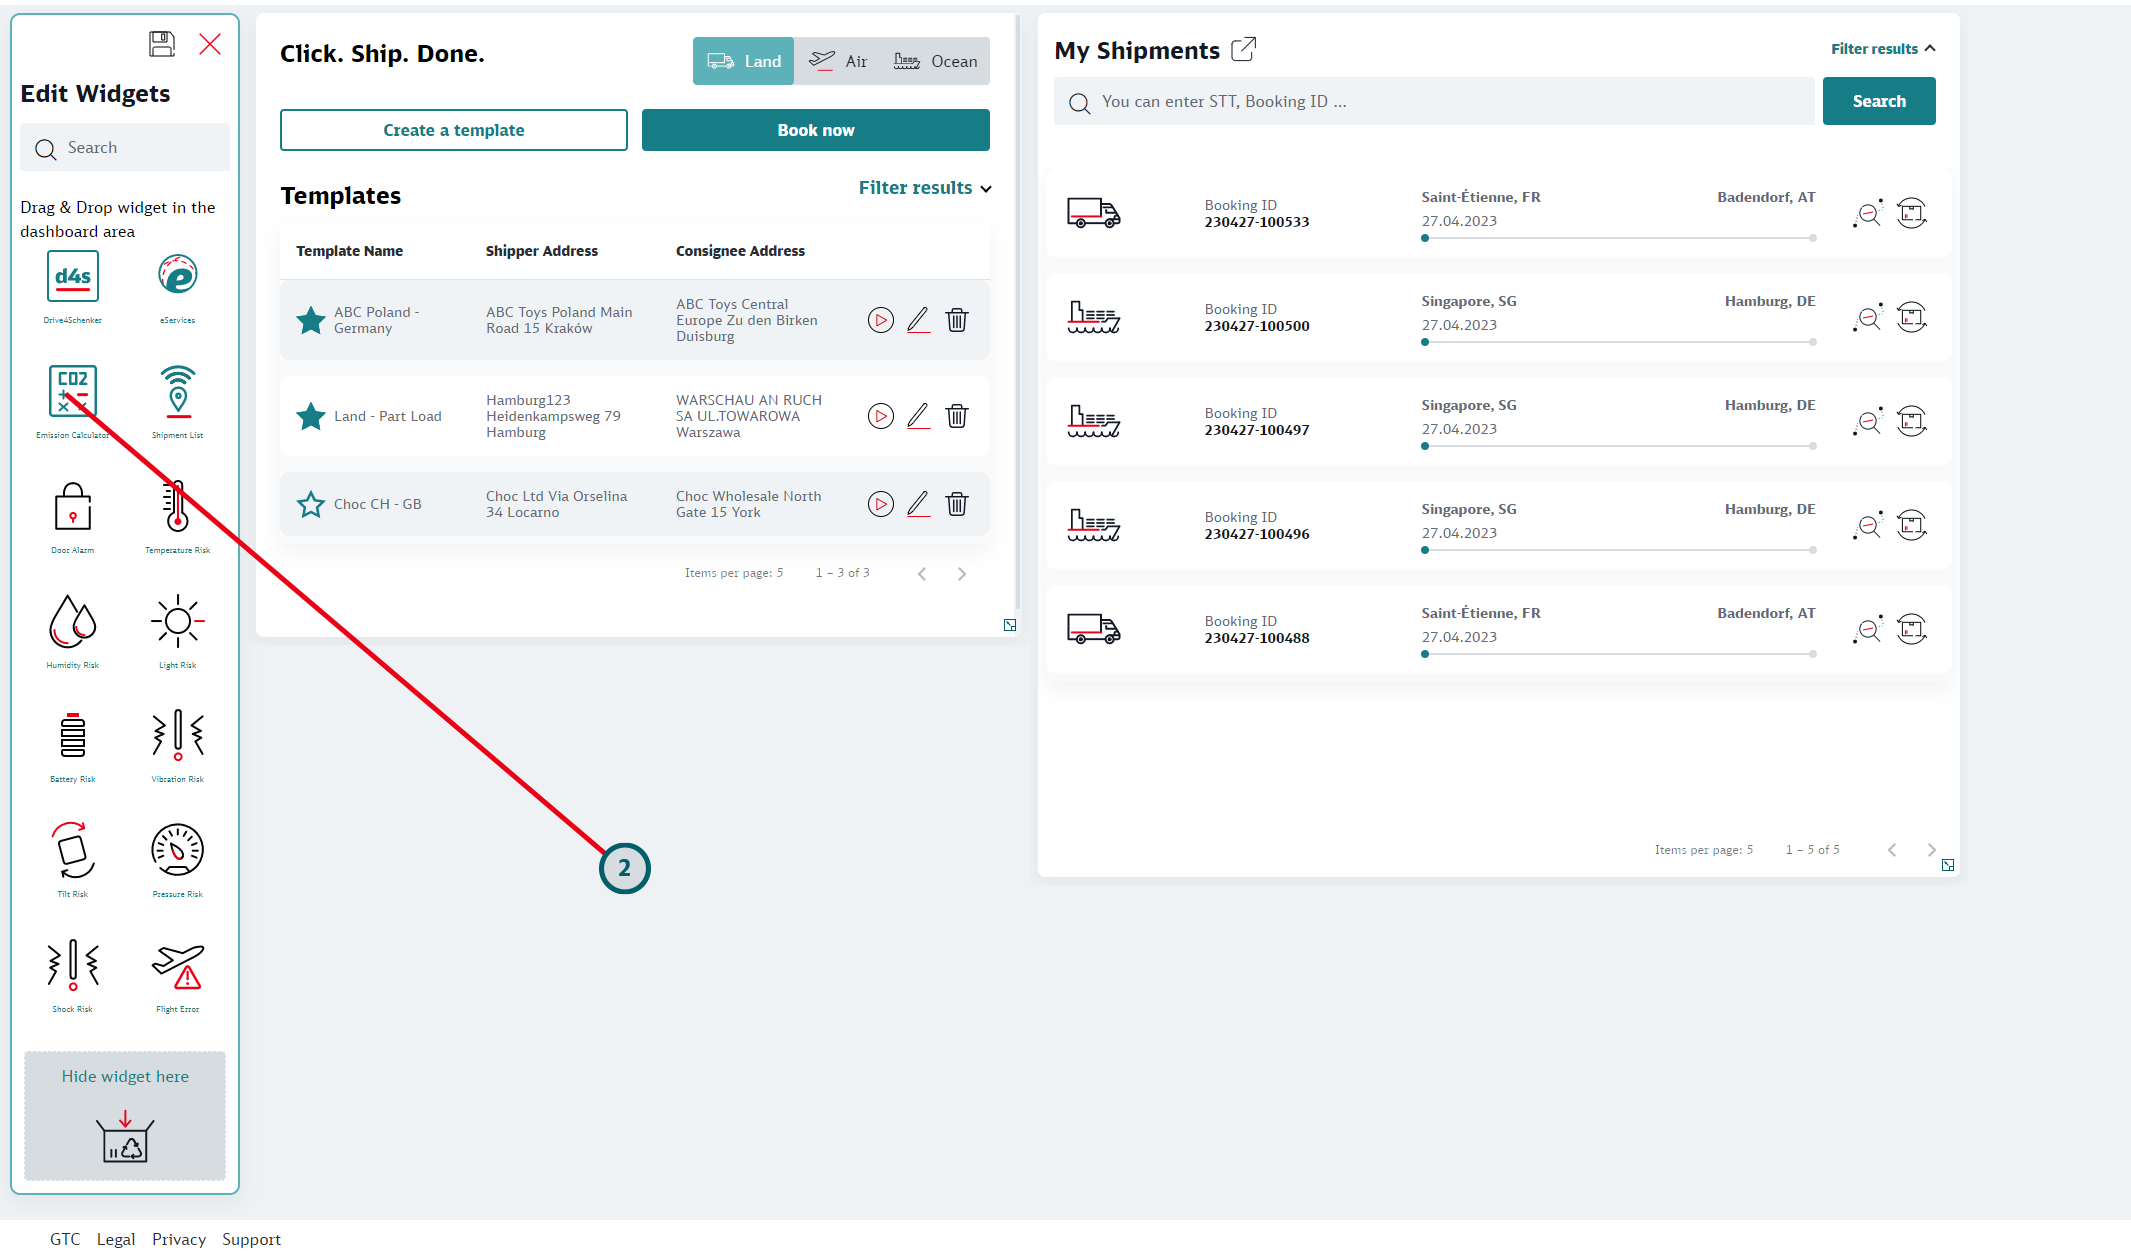
Depending on your configuration, some widgets may already be visible when you open the dashboard. Follow the instructions below to make additional widgets visible.
-
Click the "Edit Widget" icon
-
Drag the widget you want to add to the dashboard
Drag-and-drop the widget to the desired location
-
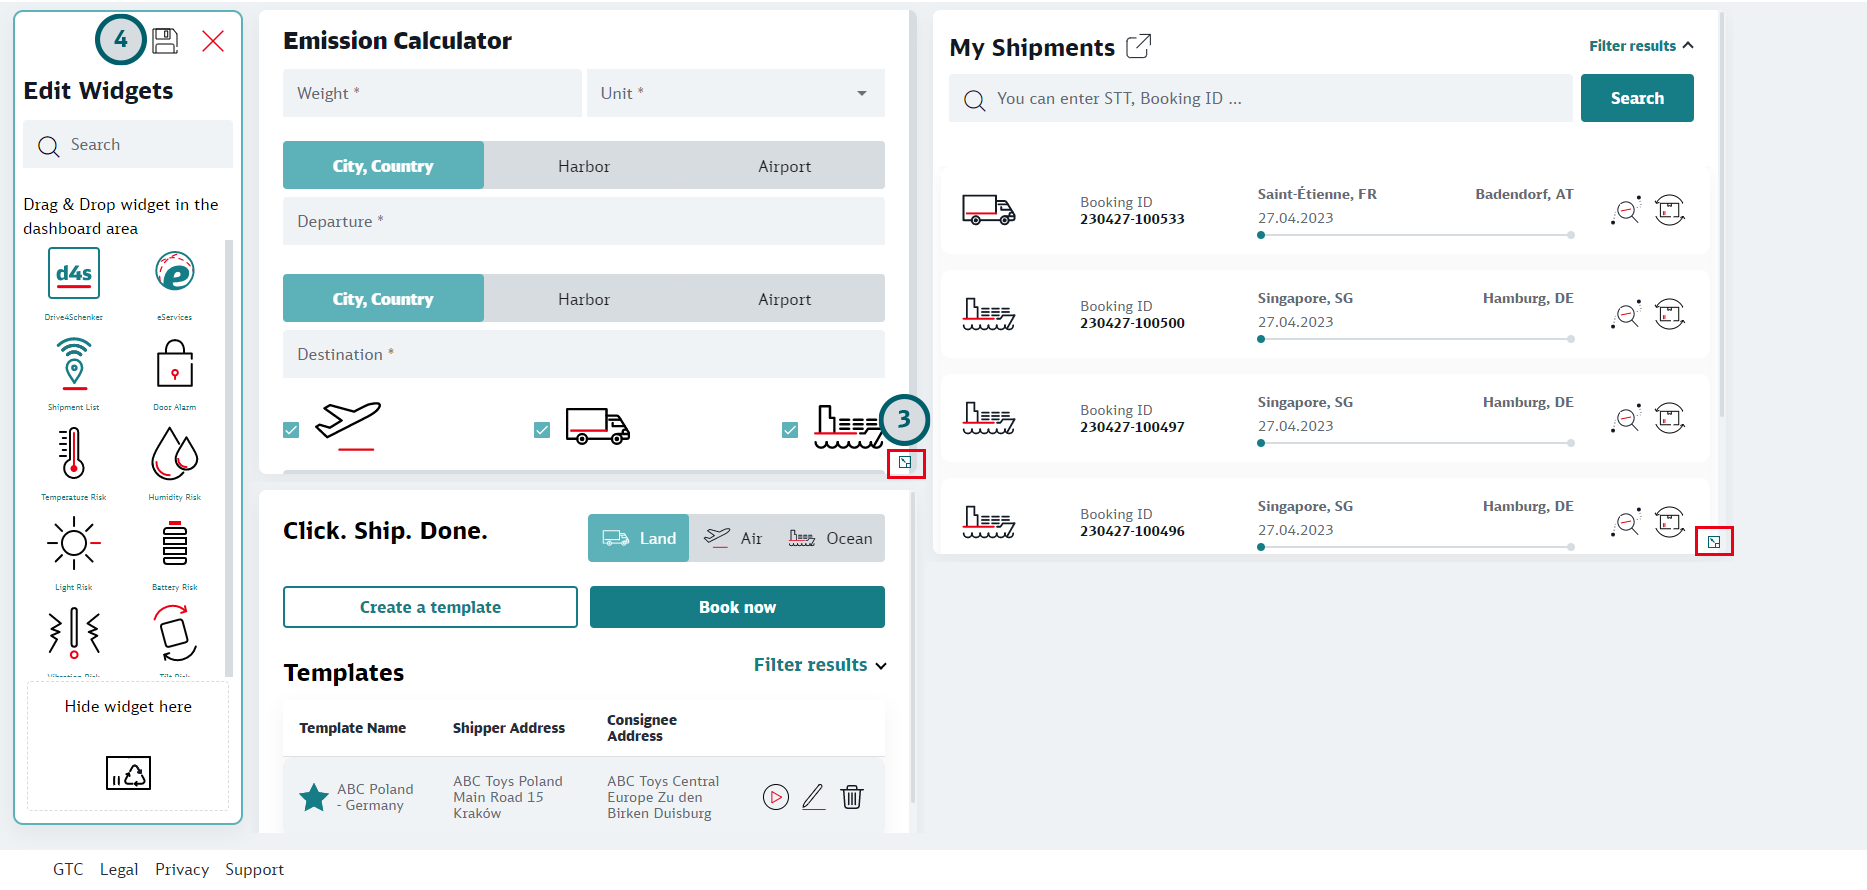
Pull the widget to the desired size
-
Click the Save icon to save your settings
0.0 Removing widgets
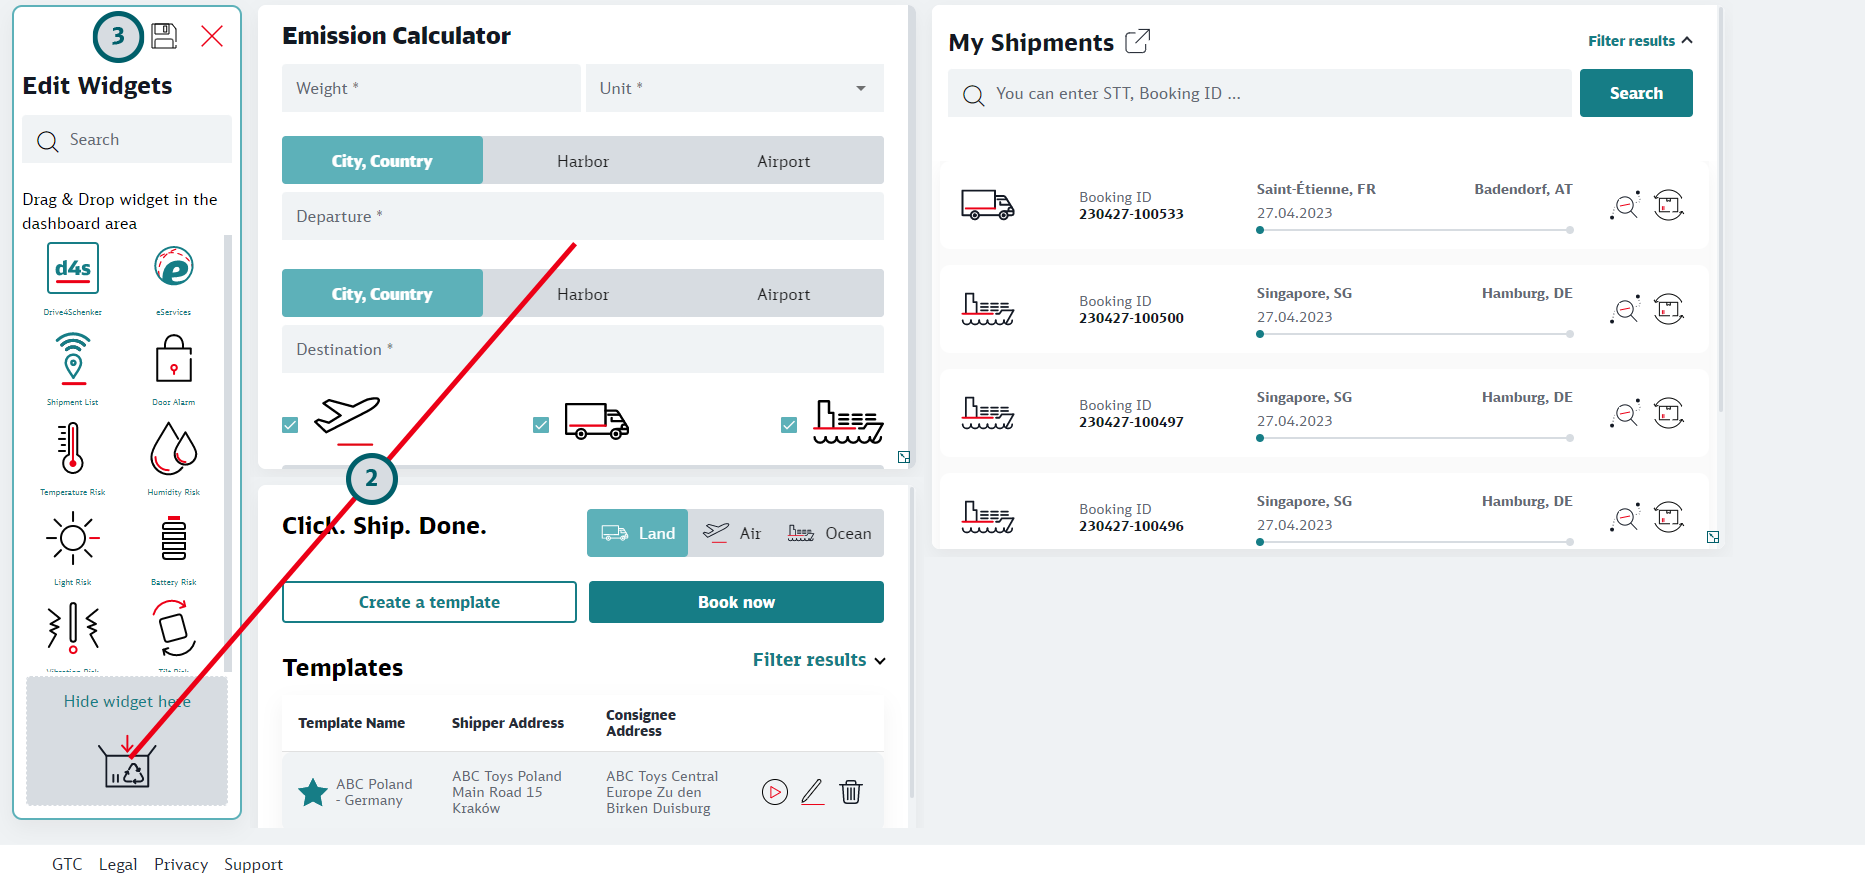
If you want to remove a widget from your dashboard, you can hide the widget from view.
-
Click the "Edit Widget" icon
-
Drag the widget to the "Hide widget" icon
Note that the cursor must be above the icon when you drop it. Otherwise the widget will not be hidden. -
Click the Save icon to save your settings
0.0 Accessing your eServices and change favorites
-
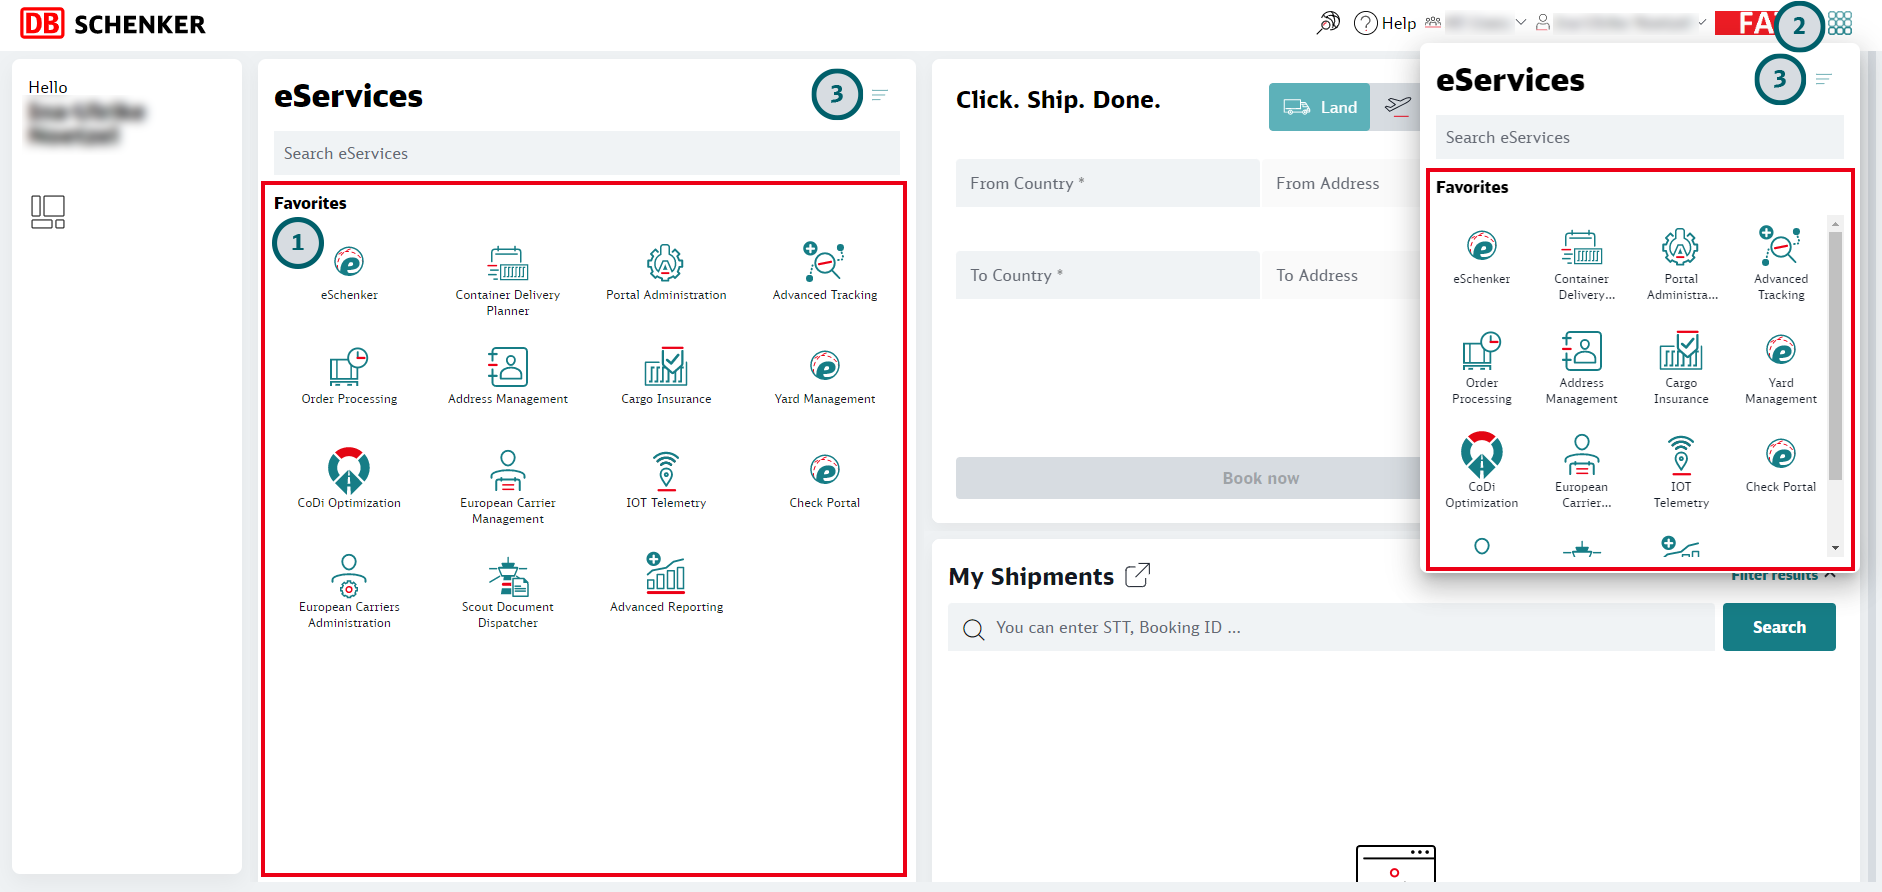
Access favorite eServices in the eServices widget
The eServices widget will show all eServices that have been marked as favorites. If you would like to see the eServices widget on the dashboard but it is not visible, follow instructions in Using the DB SCHENKER | connect dashboard on this page. -
Access favorite eServices via eServices
 icon
icon
If you do not want to use the eServices widget on your dashboard, you can access the same functionality via the icon in the top-right corner of your screen.
 -
Access all eServices
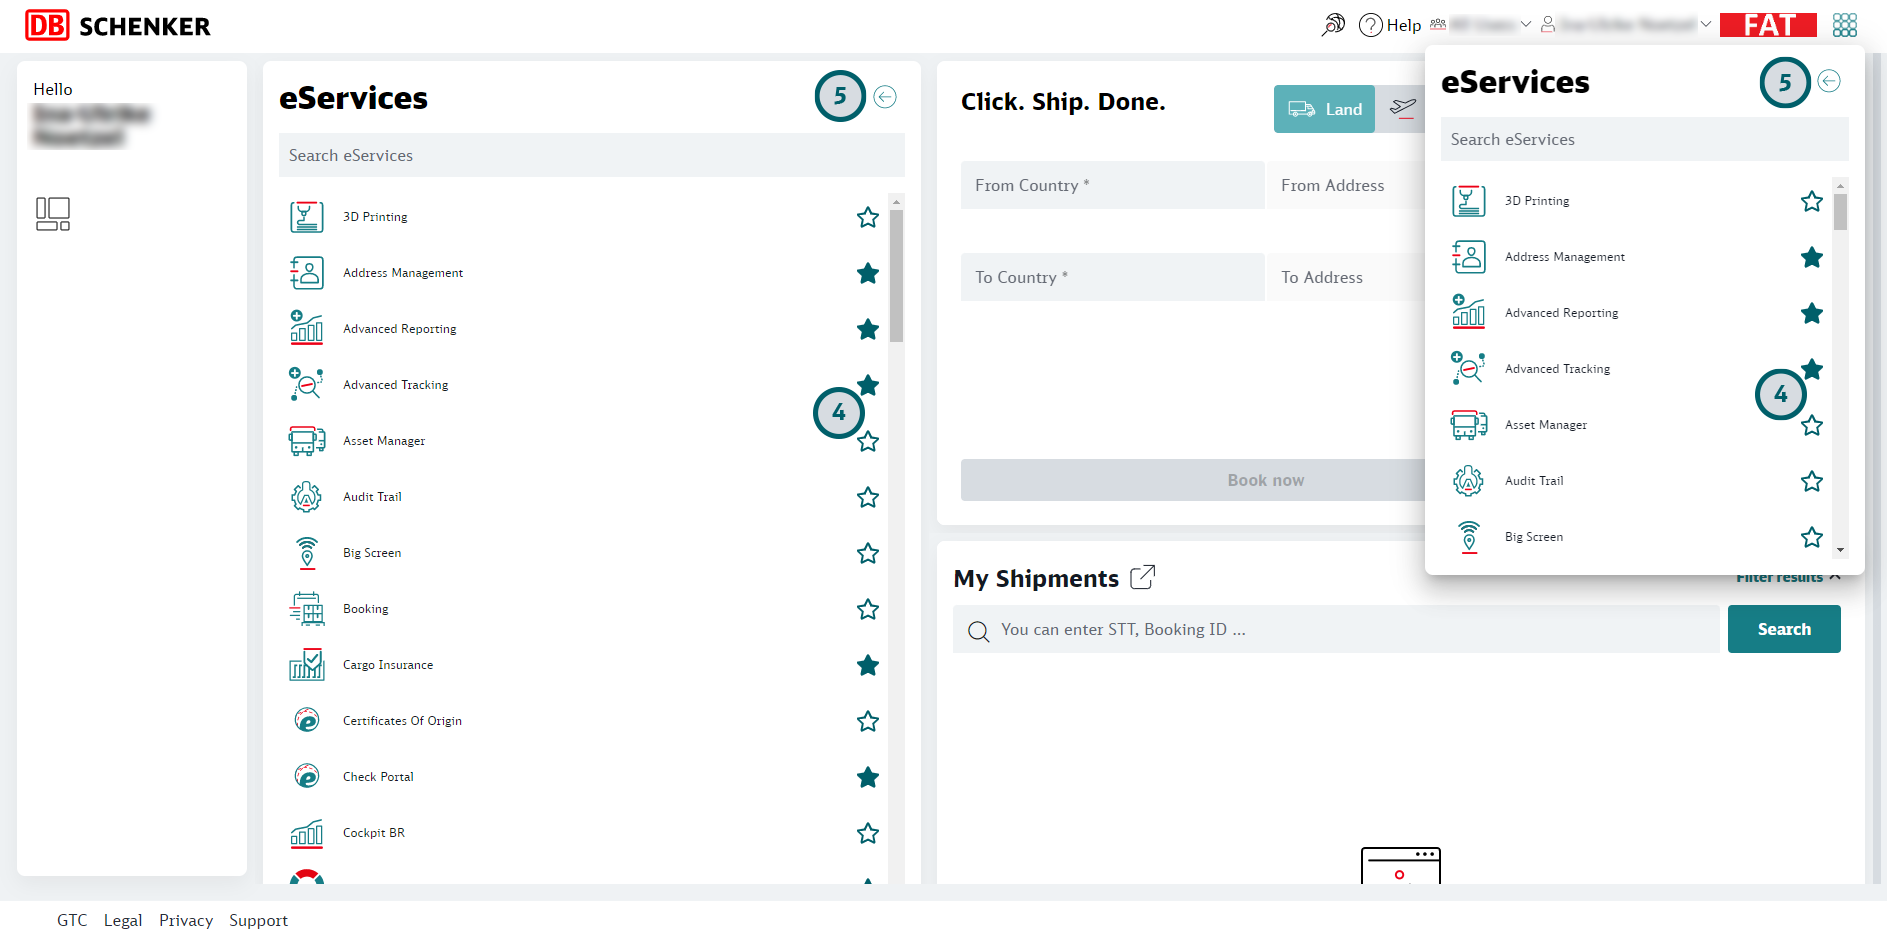
To access eServices which have not been marked as favorites click on the all eServices icon. This icon is available in the widget and in the pop-up available via the
  icon. You can also use the Search field to find a service. Type in the name or part of the name of a service, and select the service you want to use from the list of matching search results.
-
Select / deselect favorites
If you want to change your settings regarding favorite services you can do this in the all eServices list. Favorite services are marked with a . Other services are marked with a
  . To select a new favorite or to remove an eService from you favorites, click on the star to change the setting.
 -
Return the list of favorites
Click the icon to save your settings and return to the list of favorite services
0.0 Changing your language and user preferences
Watch the video for further instructions on how to set the user settings:
